Editing a Case
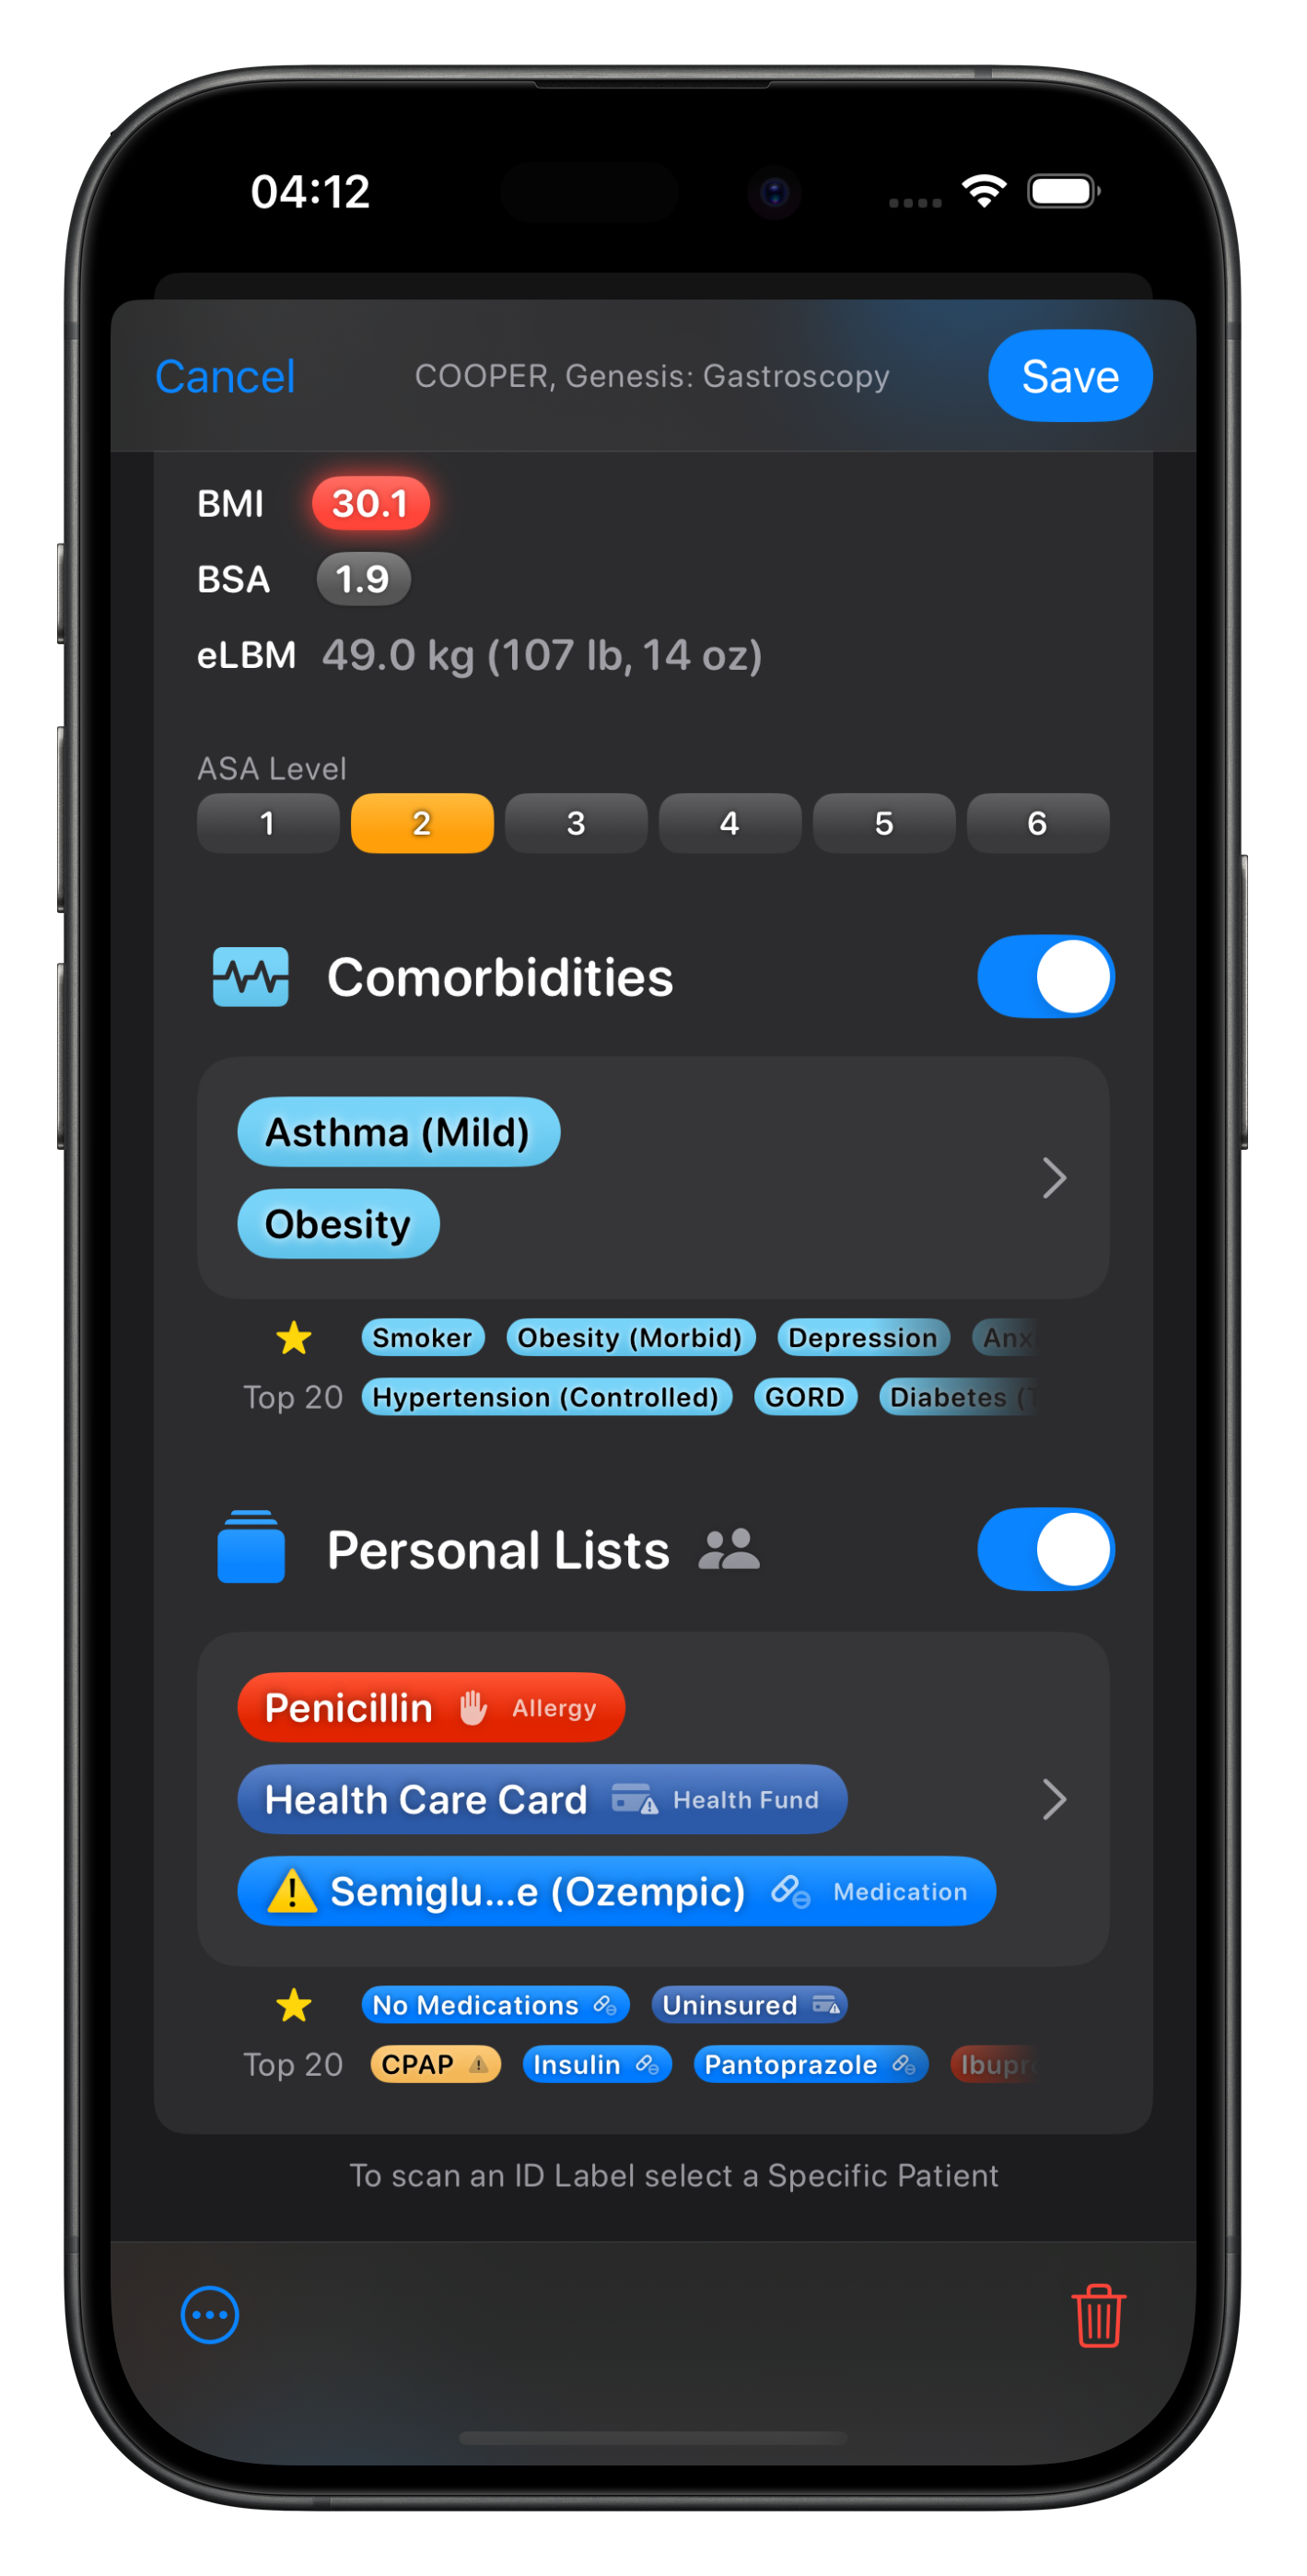
When creating a new case, or opening an existing case, you will see this screen.
I have completely overhauled this in version 10 to show even more information, and with time, speed up data entry.
The top section allows you to change the date & time, even with an active timer.
Change the Location for the Case with a tap. If you have set a map position for your Locations, it will automatically select it if you’re within 200m of that Location.
Both the Location Bubble and Timer Button have context menus behind them for even more control.


Patient Details
Select either a Generic Patient or an actual (Specific) Patient.
When selecting a Specific Patient you have the option to choose an existing Patient or add a new one, which on iOS devices, will bring up the Label Scanner.
If you save the Case and the Patient already exists in your database, you will be prompted to use the Patient’s saved details, rather than duplicate them and if they have an existing label, this will be added.
To add Comorbidities or Patient Personal List items, toggle the relevant section.
Then either tap the row to select items or, if you have existing Cases linked to them or favourited items in each category, quick add them with a tap, or even drag & drop the item bubbles.
Context menus for all item bubbles allow even more control.

Surgical & Anaesthesia Detail
Add more detail as required following a similar process.
Adding Operations or Surgeons will add Specialties automatically as required so there is no need to necessarily select a Speciality first. Quick add item choices will change based on whether you have any Specialties already set.
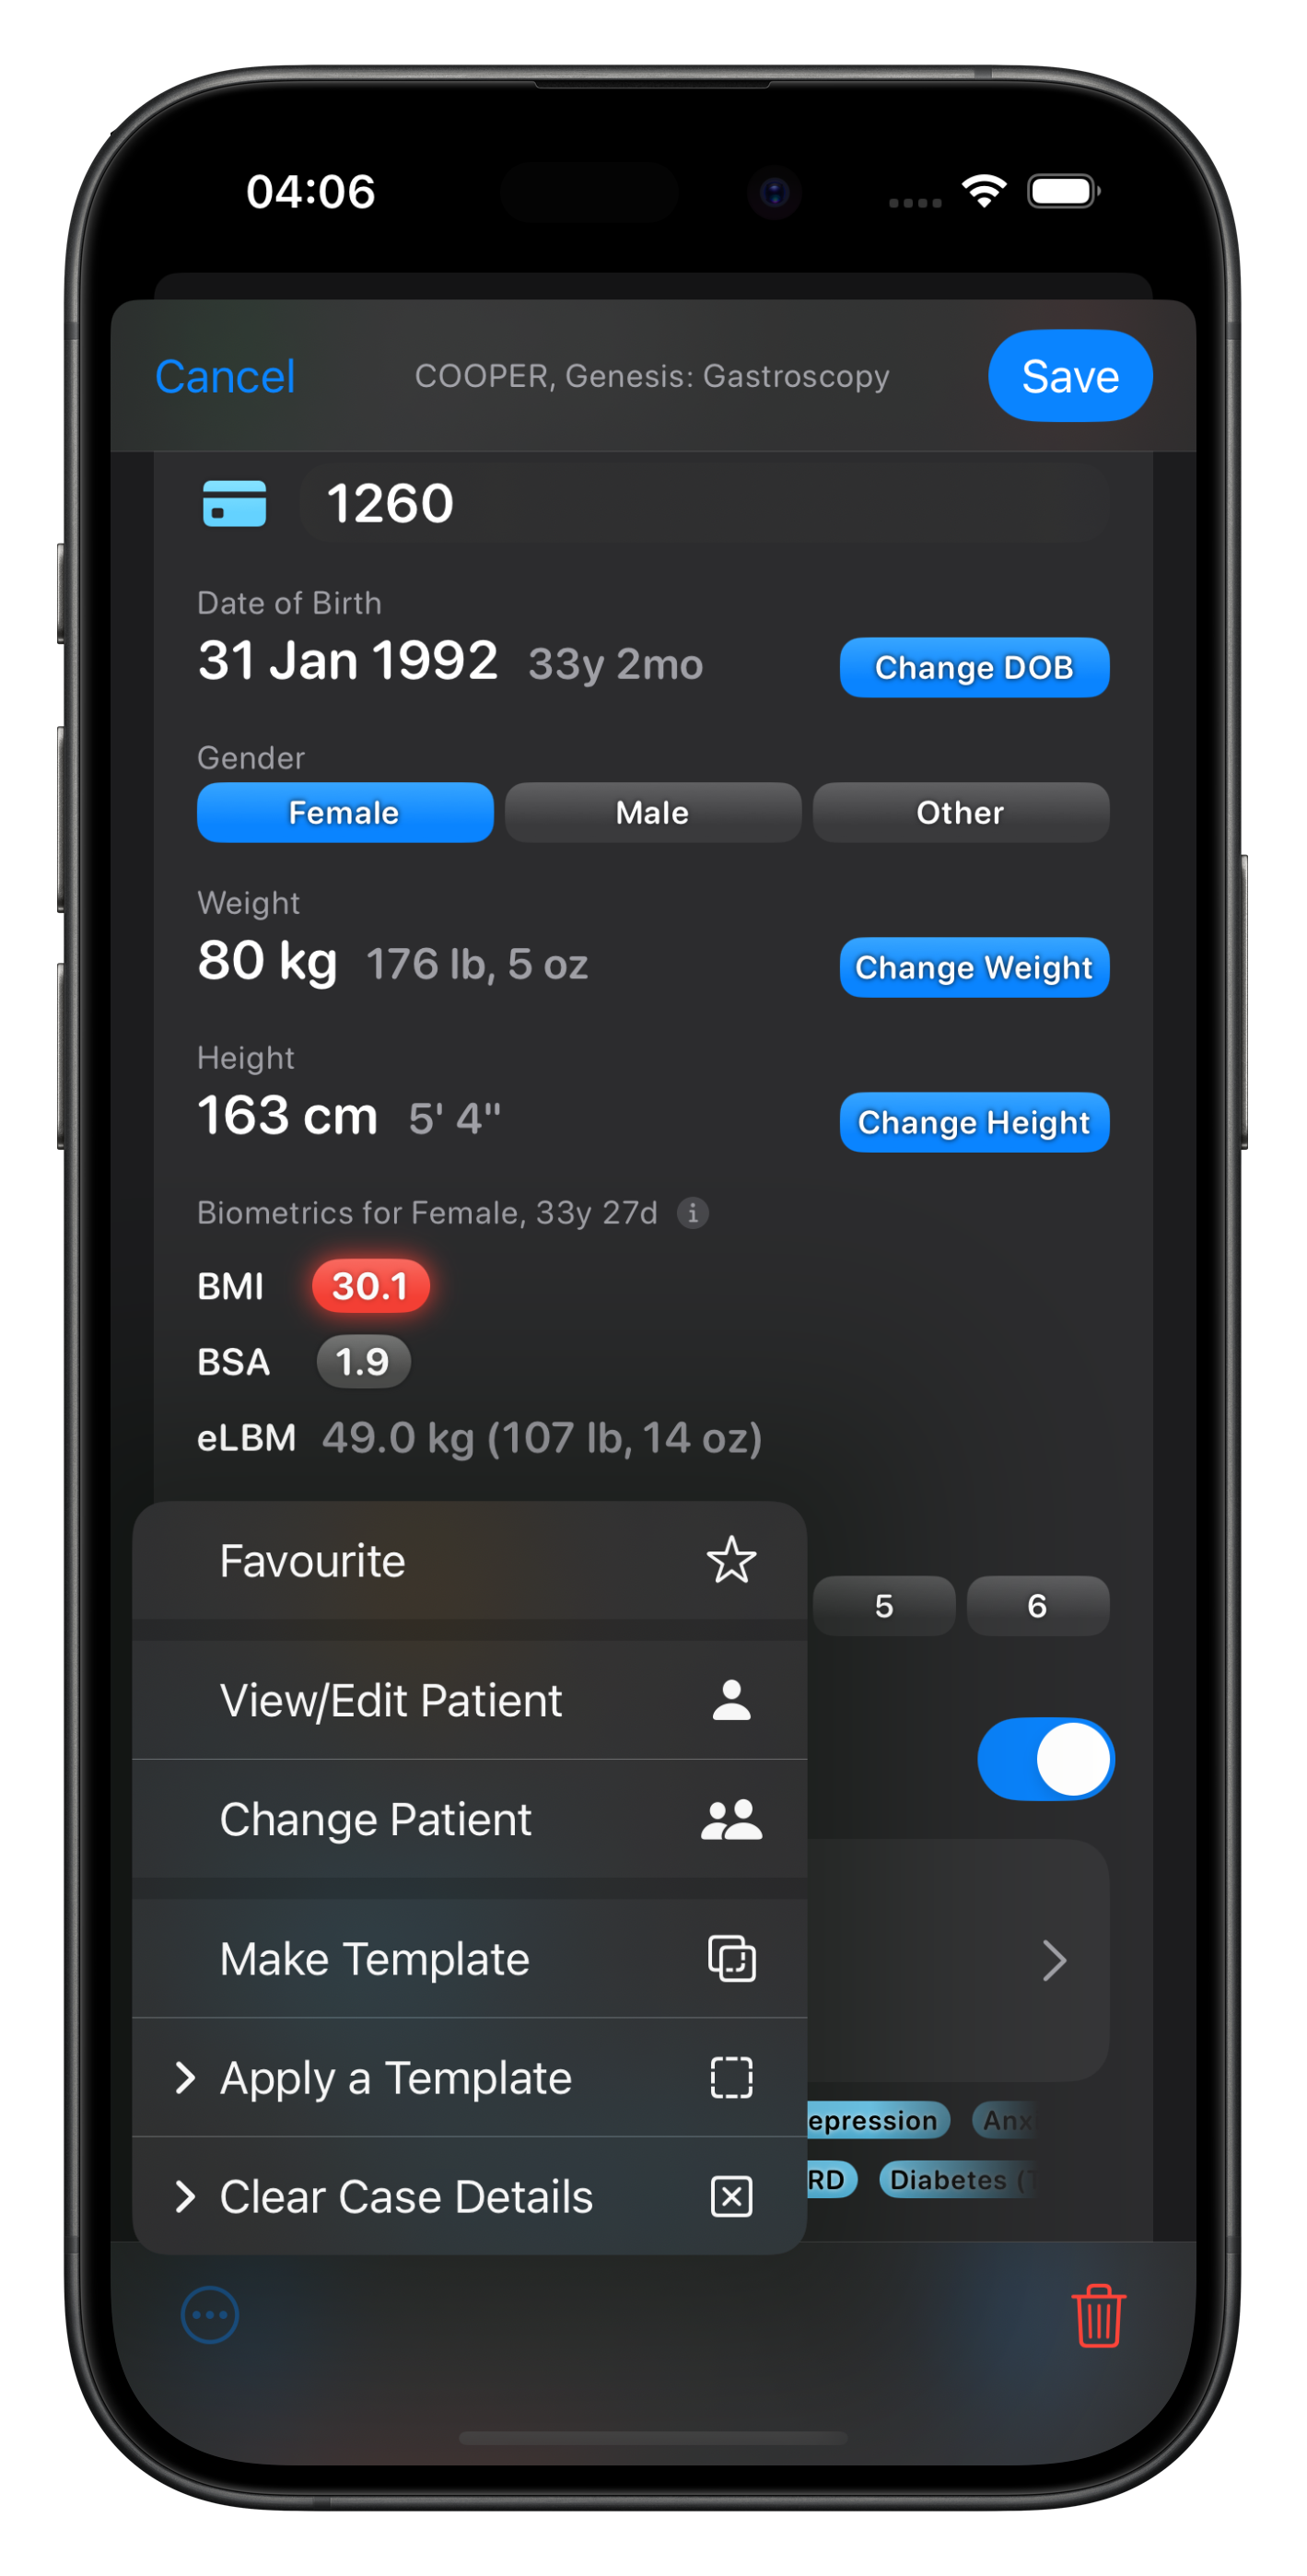
If you want to apply a Template, turn the current case into a Template, or perform other tasks, select from the menu at the bottom left.

Anaesthesia, Procedures & Incidents

To add items in these categories expand the section with the Toggle switch and add them as you would other categories. Tapping on an item or the row, will take you to the selection list.
For Case Personal Lists, tapping on an item will take you to that List directly, whereas tapping on the row will take you to ALL Case Personal Lists.
Context menus (long pressing or right click) behind the Item Bubbles will allow further control.

Training, Supervision & Photos
Select the Level of Supervision to reveal the selectors for Trainee or Supervisor. If you have set a Training Year in Settings, this will appear as an option as well.
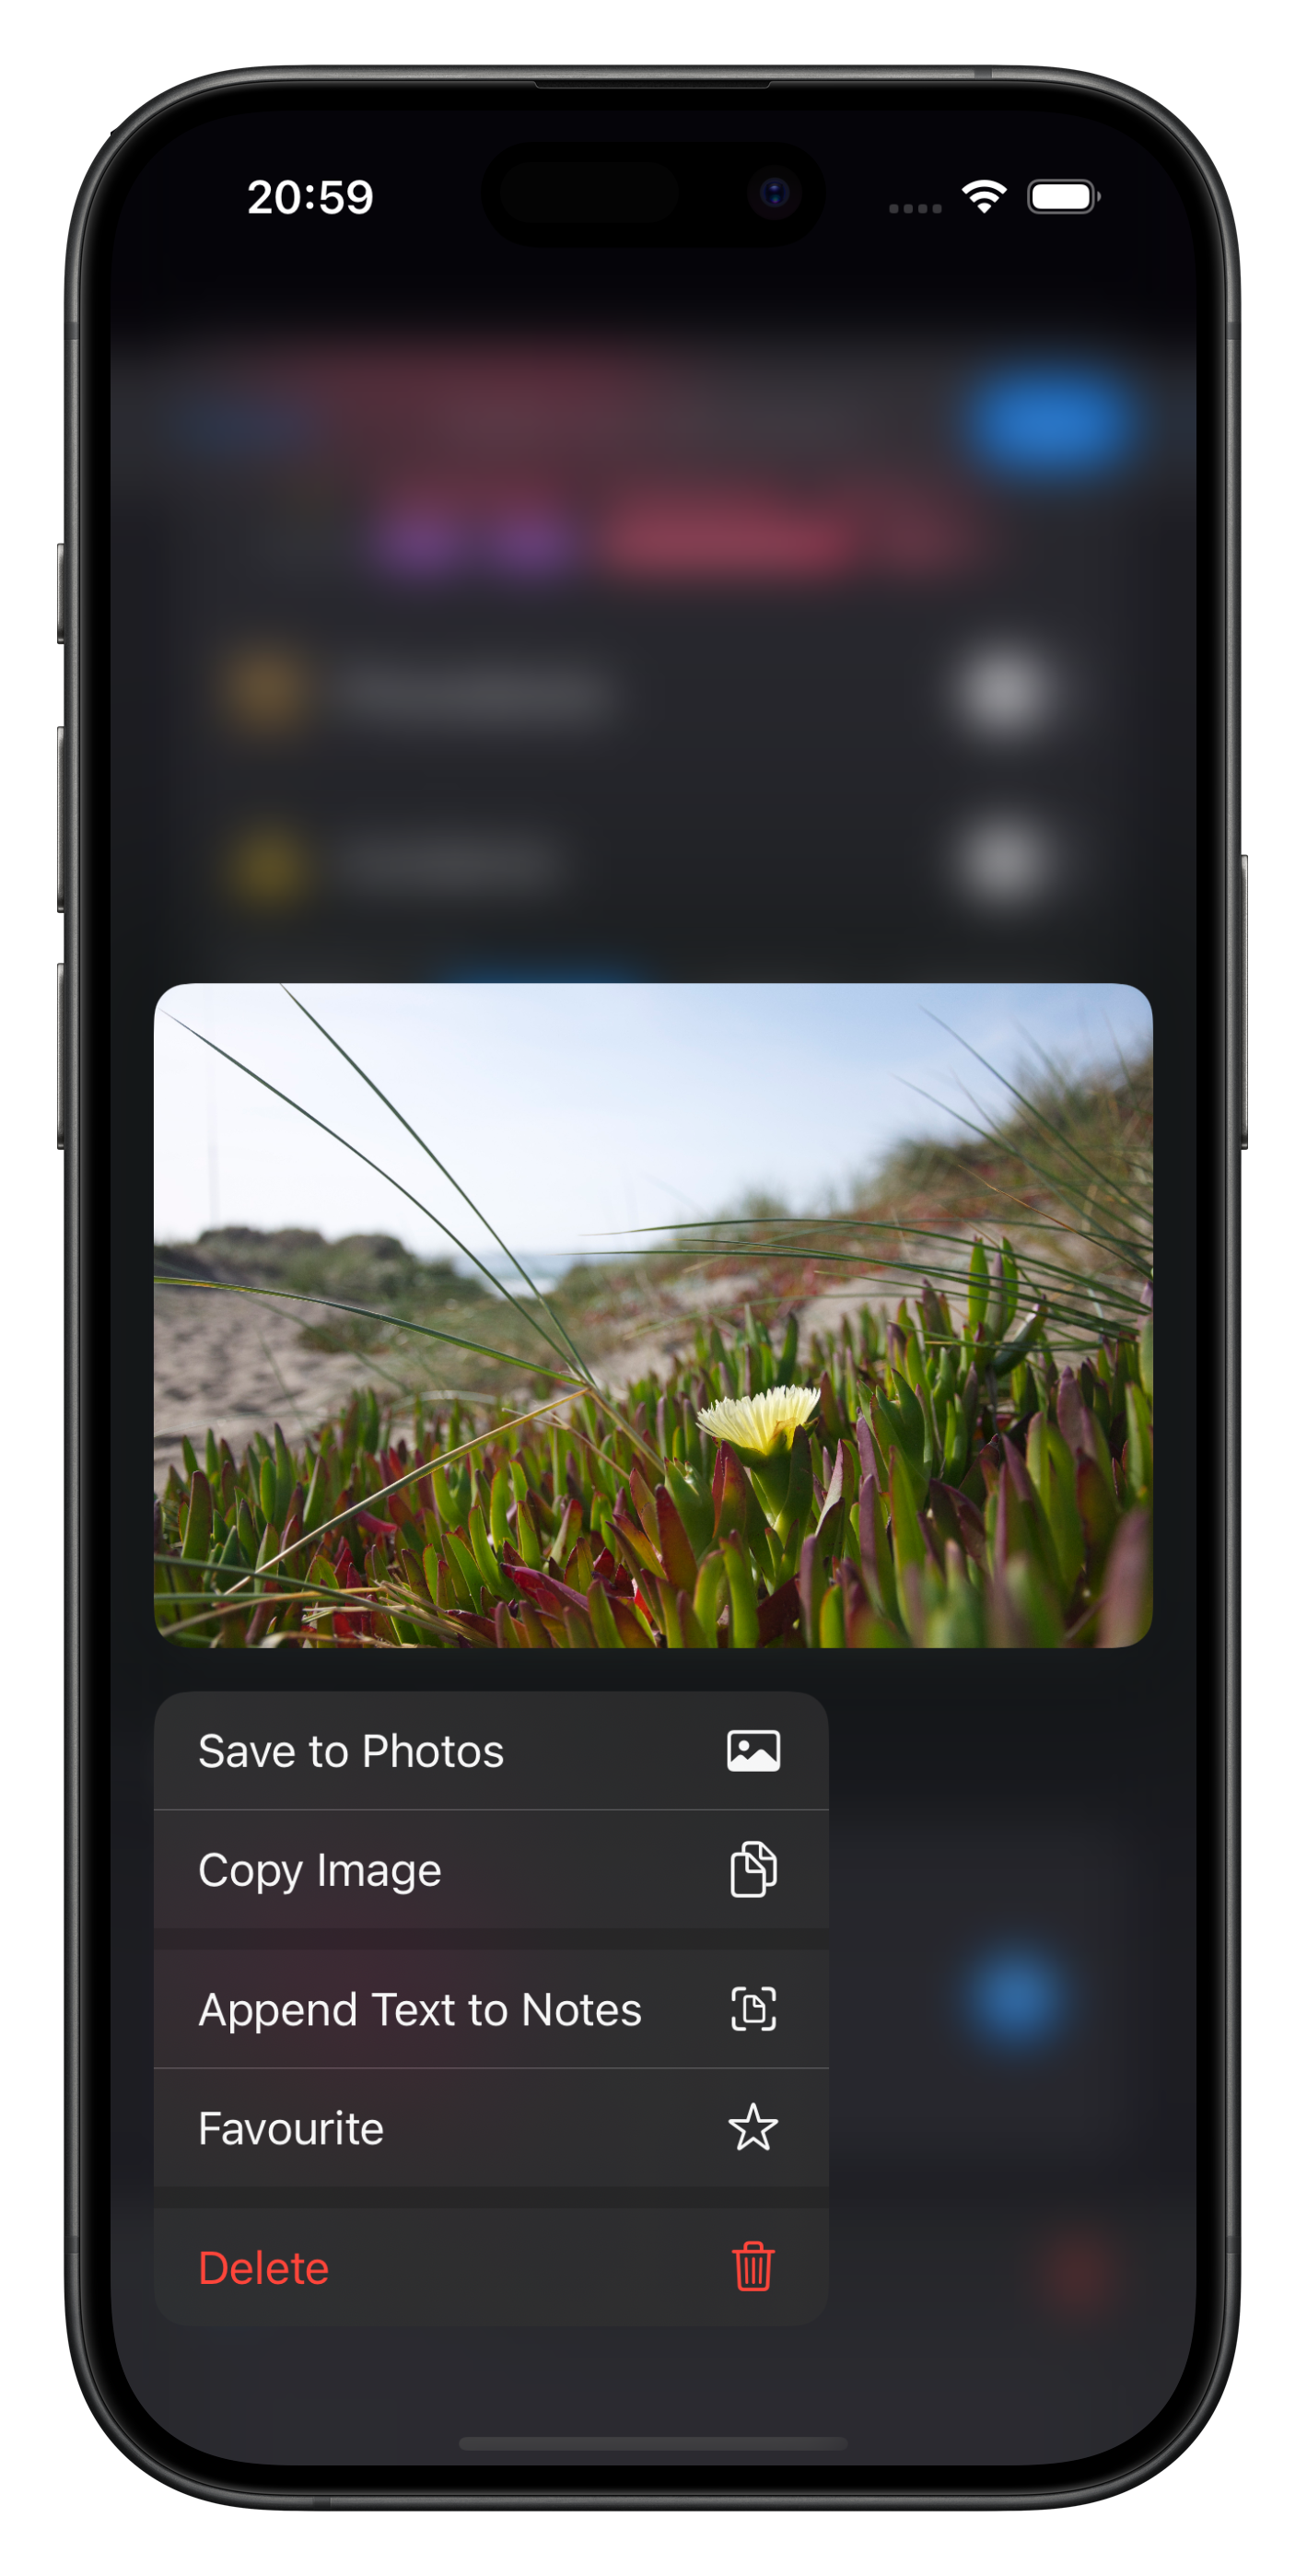
Clinical Photos can be added to your Cases and will be saved as high resolution images. Please note, excessive use of this will result in your database being very large, so use with caution.
Clinical Photos are optionally included in Case Reports (PDF) that you may wish to generate for your Cases.
You can choose the source of the images with the button, as well as using drag & drop to add or copy items. Context menus behind each photo will give you more options, as well as provide a large preview image (iOS/visionOS)
All Clinical Photos from all cases can be viewed via the Summary Tile on the All Data screen.

Notes

The Notes field is a free text area where you can type as much as you wish.
You also have the option of importing text from a Document Scanner (iOS/visionOS), Photo Library or Files.
Another new feature is the ability to rapidly log an event. See below.
Text entered into Notes takes advantage of advanced data detectors, so calling a phone number or viewing an address can be done with a long press.
Case Notes will also appear in Case Reports (PDF).

Event Logging
Logging time-stamped events is easier than ever with the addition of the Log Even option. This is accessible in two locations:
Tapping the Notes Icon Button on the Dashboard Case Card
Selecting Log Event in the Notes menu when Editing a Case

While the popup text box is limited in size on screen, you can type quite a lot of text and you can also use dictation.
When you save the event, it will be time-stamped and appended to the existing Case Notes.

